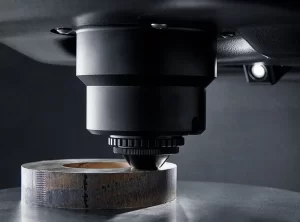
Introduction
Hardness is not a physical property but is characteristic of a material. Still, it is important to check the hardness of objects in manufacturing performance to get better performance of the manufacturing products.
If you want to measure the hardness of steel objects in the developing process but don’t know how to perform any test- then Rockwell hardness is the best option.
Rockwell hardness test is the simple hardness test. Read the article to get to know about the most simple hardness test.
I. Why is the Rockwell Hardness Test Significant?
The Rockwell hardness test is applied globally for the application of an experimental indentation hardness test. The Rockwell test is a quick process, very cost-effective, and non-destructive test (causing only minor indentation on the specimen material). The Rockwell hardness test is a simple process that is why it can be performed by anyone without special training or skills. Outcomes of the test can help in selecting the material, quality control, and providing acceptance testing of industrial products. The hardness test provides information about the specification of the object such as the tensile strength, ductility, and wear resistance.
II. What are the Benefits/ Advantages of the Rockwell Method?
The Rockwell hardness test has the following benefits:
- While initiating the test, there is no need for prior preparation of the specimen for example grinding of surface, etc.
- It can be used for non-destructive testing.
- The performer can read the outcome values from his naked eye, there is no need for any optical equipment like a microscope.
- The testing object can also be utilized for other functions.
- The Rockwell hardness test is a quick process, less time taking, and also the lesser cost is required to perform the test than other hardness tests for example Brinell, Knoop, or Vicker test which required expensive machines to be performed.
III. What are the Limitations/ Disadvantages of the Rockwell Method?

The Rockwell hardness test has some disadvantages also:
- Finding the accurate result in this hardness testing method is difficult because if you have a minor measurement mistake of depth then your entire calculation can go wrong.
- It is hard to find differences between the materials when hardness is increased.
- The area where the test is performed should be clean and must not contain any contamination for example foreign bodies, any particles, oil, or scale, so that the outcome of the test is accurate and precise.
- The effect of the indenter is unpredictable on the test outcome such as the indenter is set but its tip point is not adequately acute.
IV. Test with Diamond Cones
While doing the hardness test with diamond cones, the reference depth is 0.2 mm. The hardness test with a diamond cone is applied when the specimen object is very hard, for example hard or tempered steel.
In the Rockwell hardness process with diamond cone, variant C or the object is under the test load of 1373 N =140 kp. Here the preload is only 98 N = 10 kp. But a load of acute tests can be changed according to the application.
If you are testing thin sheets, then the risk arises that the object will get swollen on the opposite side of the test. This happens due to the high force applied in the test process and results in inaccurate measurements. To overcome this risk, variant A is used with less test force equal to 490 N. Another variant D with a test force of 883 N =90 kp can also be used when needed.
V. Test with Carbide Balls
Rockwell hardness test is applied with the carbide balls to test softer materials such as construction steels or brass because if you test soft material with diamond cones, it could cause very deep penetration into the material which will go far outside from the specified depth of 0.2mm. With a carbide ball, the specified reference depth is increased to 0.26 mm. The distribution of the degrees of hardness in various stages remains the same at 0.002 mm.
Measuring hardness with carbide balls has the outcomes that lie within the theoretical range of 0 (at the stage of full indentation depth) to 130 (at the stage of no indentation depth).
The main difference in tests with carbide balls than diamond cones is in variant B and variant F. Carbide balls are of diameter 1.5875 mm or 1/16 inches in the hardness test. The preload is set to 98N= 10kp. The test load in variant B is 883 N and in variant F is 490 N.
Conclusion
In this article, we have briefly explained the process of the Rockwell hardness test and its applications, significance, advantages, and disadvantages. Understanding hardness test methods enables manufacturers to develop clear and precise specifications and can eliminate delays caused by providing too little information. Keep in mind that before conducting any hardness test, check the indenters for any kind of damage, which can affect the results. To know more about the Rockwell hardness tests or various hardness tests, visit our website and get free consultancy.

